pcb-rnd knowledge pool
Copper polygon pull away from board edge
| board_edge_copper by Tibor 'Igor2' Palinkas on 2019-12-24 | Tags: howto, copper, board, edge, keep, pull, away, clearance |
Abstract: For some boards or fabbing processes, copper polygons shall not extend to the routed edge of the board. This is often called "pull back" and can be achieved combining existing features in pcb-rnd. It can also be automated using an user script, providing both GUI and CLI access.
Why would you need a pull-away?
A possible reason, with low end fabs, is peeling of the copper foil, starting at the routed edge. This is rare these days.
A more common reason is potential short circuits between layers, that may happen when insulator layers (substrates, prepregs) are thin. If router tool is dull, soft copper may be smeared at the edge and a smear could connect the edges of copper layers vertically on the side of the cut. This effect is rarely seen with thick, 2 or 4 layer boards.
How it is done (theory)
For drills and slots created using padstacks the clearance setting guarantees a copper-free region. However, board edges are drawn on boundary and/or mech layers as plain lines and arcs, not padstacks. An important difference is that a padstack is a vertical construct, thus can affect multiple layers; a plain line or arc is a layer object, when drawn on a mech layer, it has no chance to affect (e.g. create polygon clearance) on a copper layer.
The solution is easy:
- copy all boundary/mech lines and arcs to all copper layers
- make sure they all have the desired clearance value; this will get all polygons "pull away" from these objects using the normal polyogn clear mechanism
- mark them all with the noexport attribute, so they won't appear as actual copper objects in the gerber export
This method is tiresome in practice, especially if there are many copper layers and the boundary of the board changes. This howto demonstrates semi-automation of the process using the on_every_layer script.
How it is done (practice)
Step 1. download the script
The script is called on_every_layer and is available on edakrill . Download the tarball and unpack.
Step 2. load the script
Run pcb-rnd, open the board. Load the script:
| GUI | CLI |
|---|---|
|
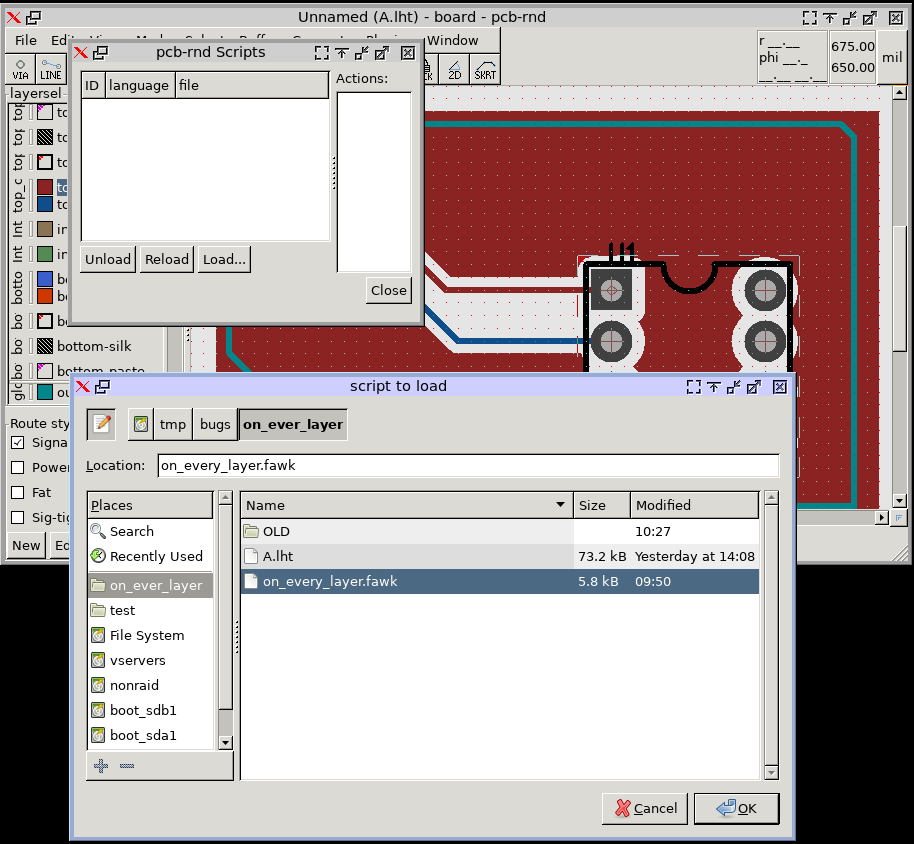
Click plugins menu, manage scripts (or {p m s}). This will open the manage plugins dialog. Click on the "Load..." button and select the fawk script in the file choosed:
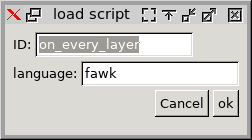
Click "Ok" on the smallish dialog box that pops up:
|
execute the following action: LoadScript(oneveryly, "/PATH/on_every_layer.fawk", fawk); (replace PATH with the full path to the script) |
Step 3. Mark source objects: select them
Each source object that will need to be copied to all copper layers needs to be marked with the on_every_layer attribute. The value of the attribute should be a group ID, an arbitrary name you can make up. For our example we will use edge for the attribute value. The easiest way to set this attribute to all existing boundary objects is to select them by layer and use the property editor.
| GUI | CLI |
|---|---|
|
Open the advanced search dialog box (select menu, advanced search and select). Click on the 'E' mark of the first expression and select Host layer's type, ==, and BOUNDARY:
Click on "Ok", and then on "Apply" in the search dialog. |
execute the following action: query(select, "@.layer.type == BOUNDARY") |

This step may be repeated with MECH instead of BOUNDARY for hand drawn (non-padstack) slots and cutouts.
Step 4. Mark source objects: set the attribute
Use the property editor to add the attribute to every selected object:
| GUI | CLI |
|---|---|
|
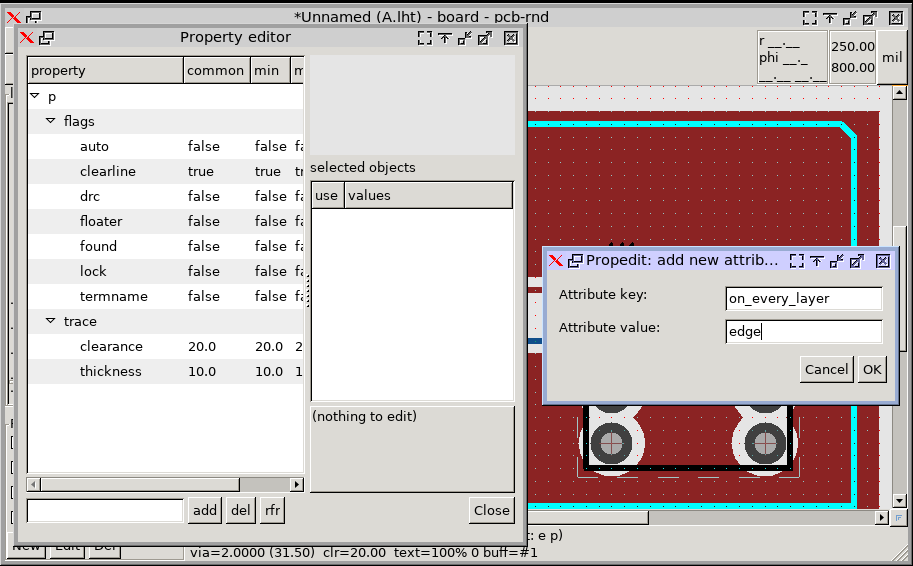
Press {e p} (first 'e' then 'p') to invoke the property editor for selected objects. Click on the "Add" button on the bottom to add a new attribute. Fill in on_every_layer for key and edge for value.
Click on "Ok", and then on "Close" in the property editor. |
execute the following action: propset(selection, "a/on_every_layer", "edge") |
An example board is available with the attribute already set up.
Step 5. Make the copies
Now invoke the script and update the design for the "edge" group:
| GUI | CLI |
|---|---|
|
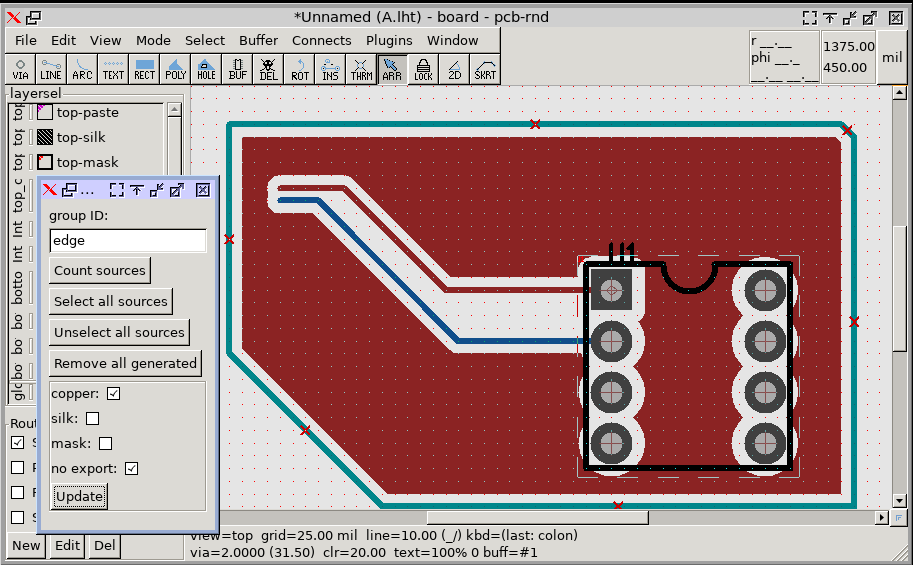
Open the command line (press the ':' key), type OnEveryLayer and press enter. This should pop up the script's dialog. Enter edge for the group ID and click on the update button.
|
execute the following action: OnEveryLayer(update, edge, cn) "cn" is for "copper" and "noexport". Each letter is an option. Add "s" for silk, "m" for mask. |